Gaining Experience In DevOps: AWS resources creation with Terraform
June 07, 2023 • 17 mins read

Welcome to this practice where together we are going to work with interesting DevOps tools and review some cloud notions. We shall progressively look into different cloud resource provisioning methods, with a particular focus on how AWS resources are provisioned using Terraform.
By the end of the practice, we are going to have an Ubuntu virtual machine able to host a Java application built and deployed by Jenkins.
Provisioning cloud resources can be a complex and daunting task, especially for those who are new to cloud computing. The complexity of cloud infrastructure, the wide range of options available in some cloud vendors, and the required technical expertise are some of the many factors making cloud resource provisioning tough.
Here is how such resources can be provisioned:
- Use of cloud provider user interfaces
- Use of cloud provider API/CLI
- Use of IaC (Infrastructure as code)
These are the main methods used to create cloud resources on platforms like AWS (Amazon Web Service) or GCP (Google Cloud Platform), and each of them is preferred either based on specific requirements or the level of expertise. For this practice, an AWS EC2 instance is to be provisioned by combining all three methods with an emphasis on the Infrastructure as Code. So without further ado, let's get our hands dirty.
Contents
- AWS IAM Service
- AWS CLI Configuration
- Terraform Configuration
- EC2 Instance Declaration
- EC2 Instance Launch
- EC2 Instance Remote Access
Before we begin
- An AWS account is required for this practice
- AWS won't charge a penny as we are only going to play with the AWS Free Tier
- I will be doing this on MAC OS but Linux or Windows would work just fine for this practice
AWS IAM Service
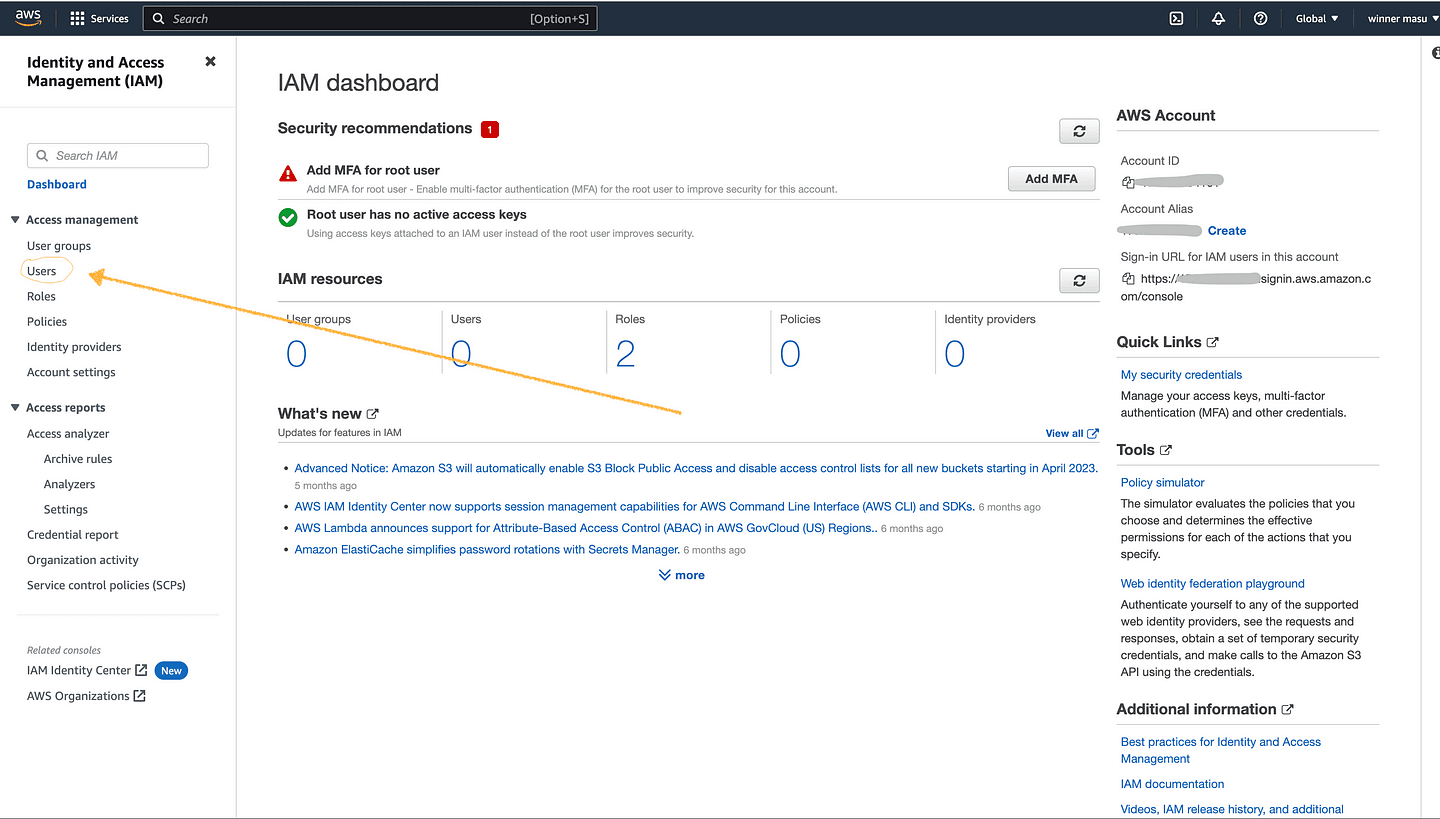
Here we are working with the AWS Identity and Access Management (IAM) service which allows us to create and manage users or groups of users and control their access to AWS resources that will be created shortly.
With your AWS root account, let's get into the AWS home console and search for the IAM service in the search box, alternatively one could follow this path services > security, identify & compliance > IAM.

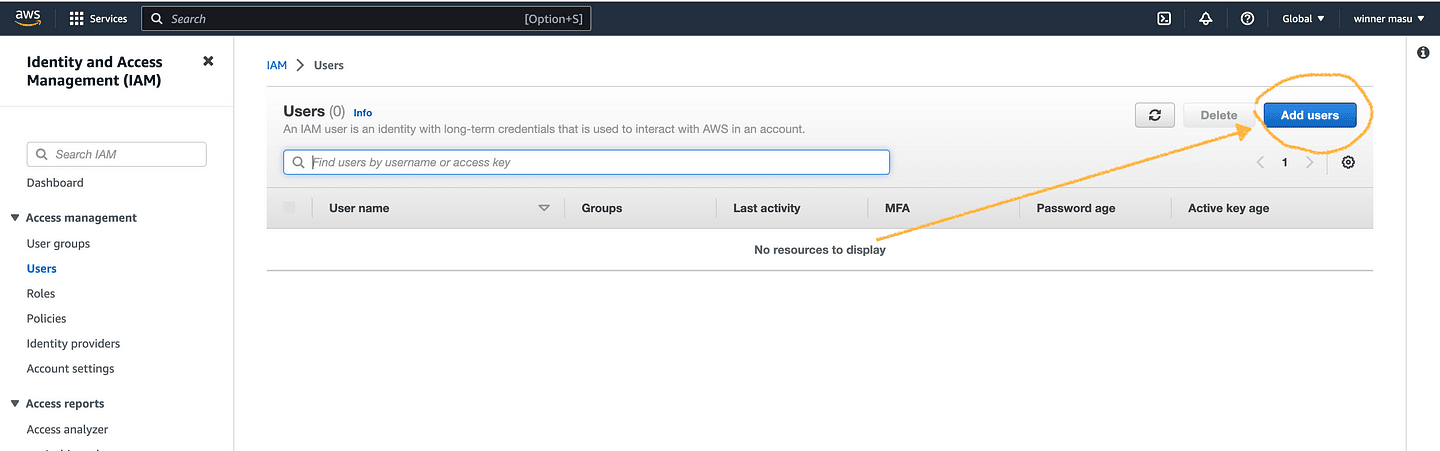
Once in the IAM service dashboard, please create a user by clicking on the Users menu available on the left side of the page.
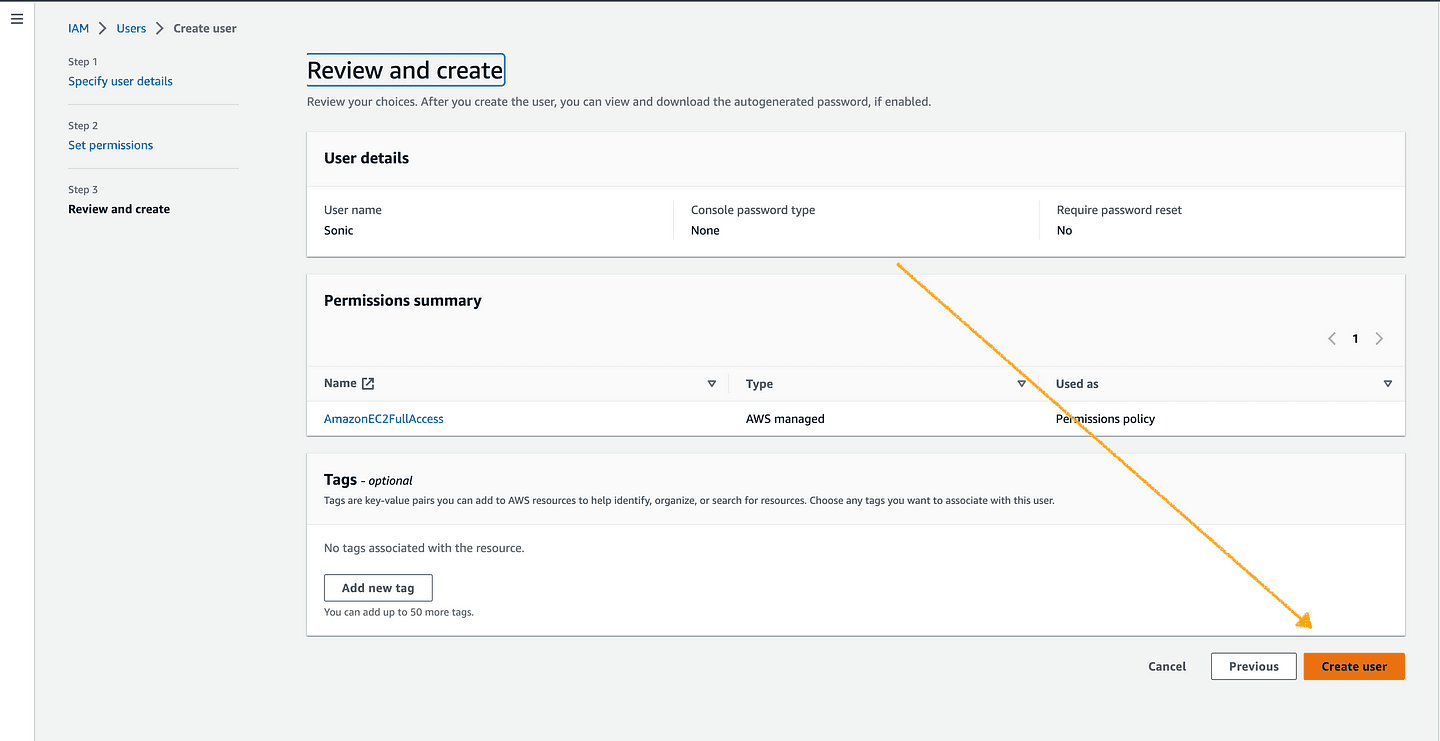
In IAM > Users, click on the blue button labeled "Add Users" which takes you through 3 phases. First, user details should be given, second permissions for the user should be set, and finally, a Create user button shows up to complete the action.
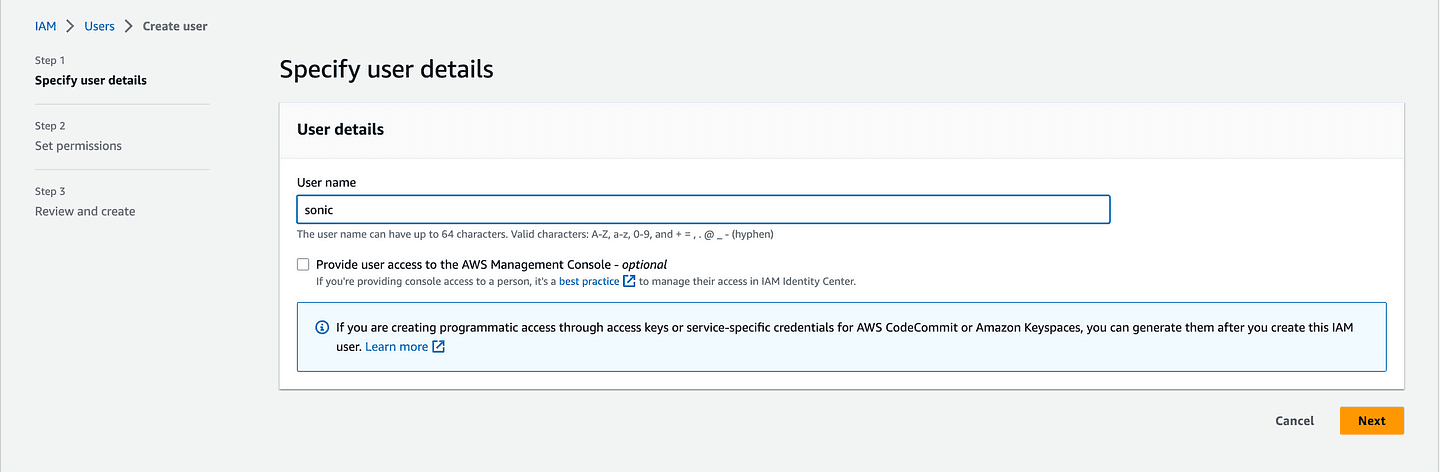
Phase 1 (add a user name and click next)
Phase 2 (Add permission to the user)
It is good practice not to give a user full access to all AWS resources and services. In our case, we are going to directly attach to the new user a policy that only gives permission to access the AWS EC2 service.
In the gif image below, we are attaching the AmazonEC2FullAccess policy to Sonic our user. Do the same with your user and click on next.
Phase 3 (Click on the orange button "Create user" to complete the action)
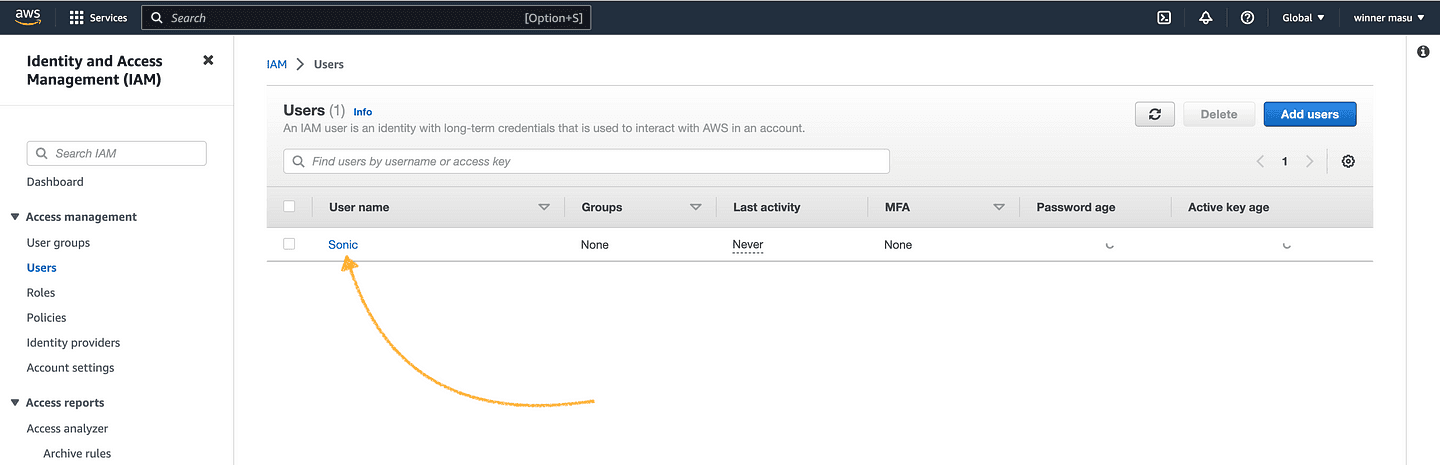
Now that we have successfully created an IAM user, let's generate access keys 🔑 that later will be used to access AWS services through the terminal. Accessing AWS via command line is as we mentioned another method of provisioning cloud resources, we will be using the AWS CLI (command line interface) to configure our local environment with the correct access keys.
To generate those keys, navigate back to IAM>Users and click on the new IAM user, Sonic in my case.
By clicking on Sonic or on your user, you will be directed to IAM > Users > Sonic or IAM > Users > Your User Name. In there, click on Security Credentials as shown below:
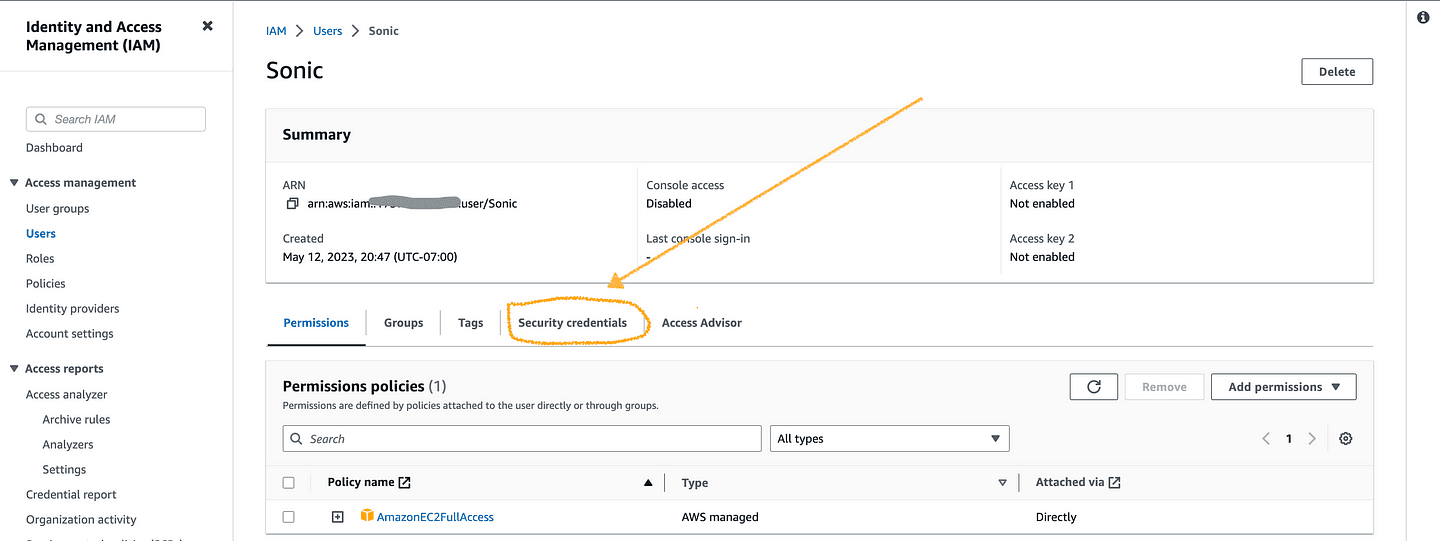
In the security credentials section, you are presented with a range of options including console sign-in, multi-factor authentication (MFA), and Access Keys. Use the latter to generate your access keys, here is how you will do it:
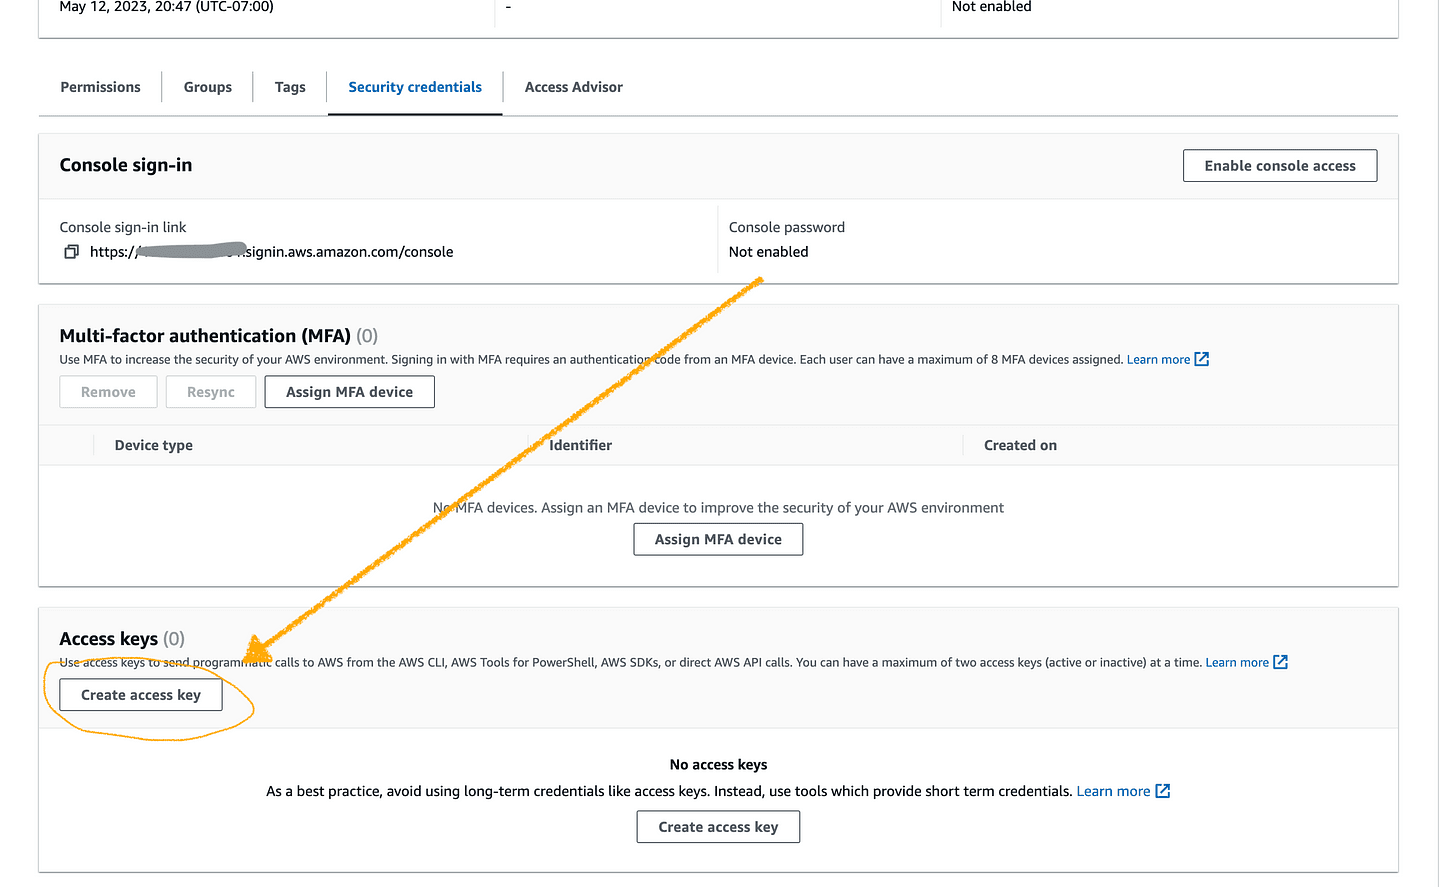
A click on the Create access key button leads to IAM > Users > Sonic > Create access key where you will be asked to select a use case, which just describes how and why the access keys are going to be used. So go ahead, select the option command line interface (CLI), set a description tag value (optional), and click on the orange button "Create access key".
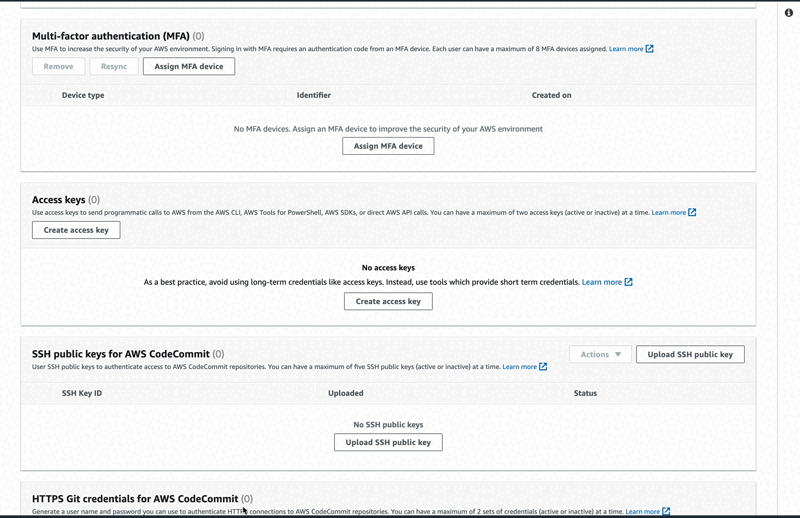
Note: 📌 Make sure to copy your new access and secret keys somewhere as you cannot retrieve them if lost or forgotten 🤦🏾♂️.
Hourra ✌🏽, here we are done dealing with the AWS user interface, we had created a user who was given permission to use the AWS EC2 service and we just created access keys that will allow the user to have access to AWS through the command line.
AWS CLI Configuration
At this stage of the practice, we will install AWS CLI and configure it with the access keys generated earlier, this will enable our IAM user to perform EC2 tasks based on the permission policy assigned.
Download the AWS CLI package here 👈🏽:
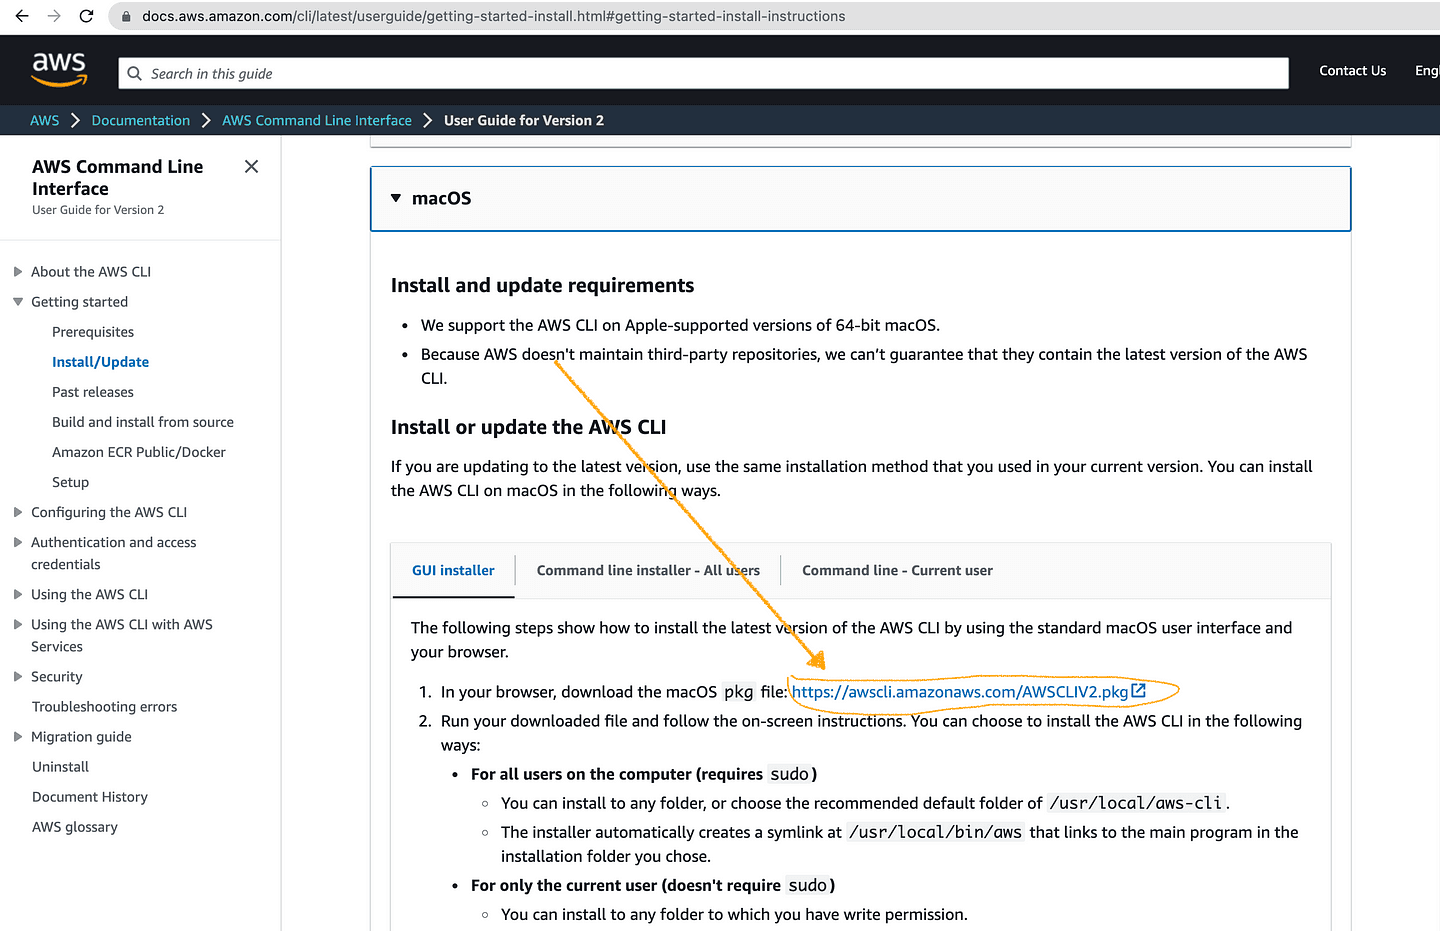
To run the downloaded .pkg file and therefore install AWS CLI, double-click on it and follow the instructions.
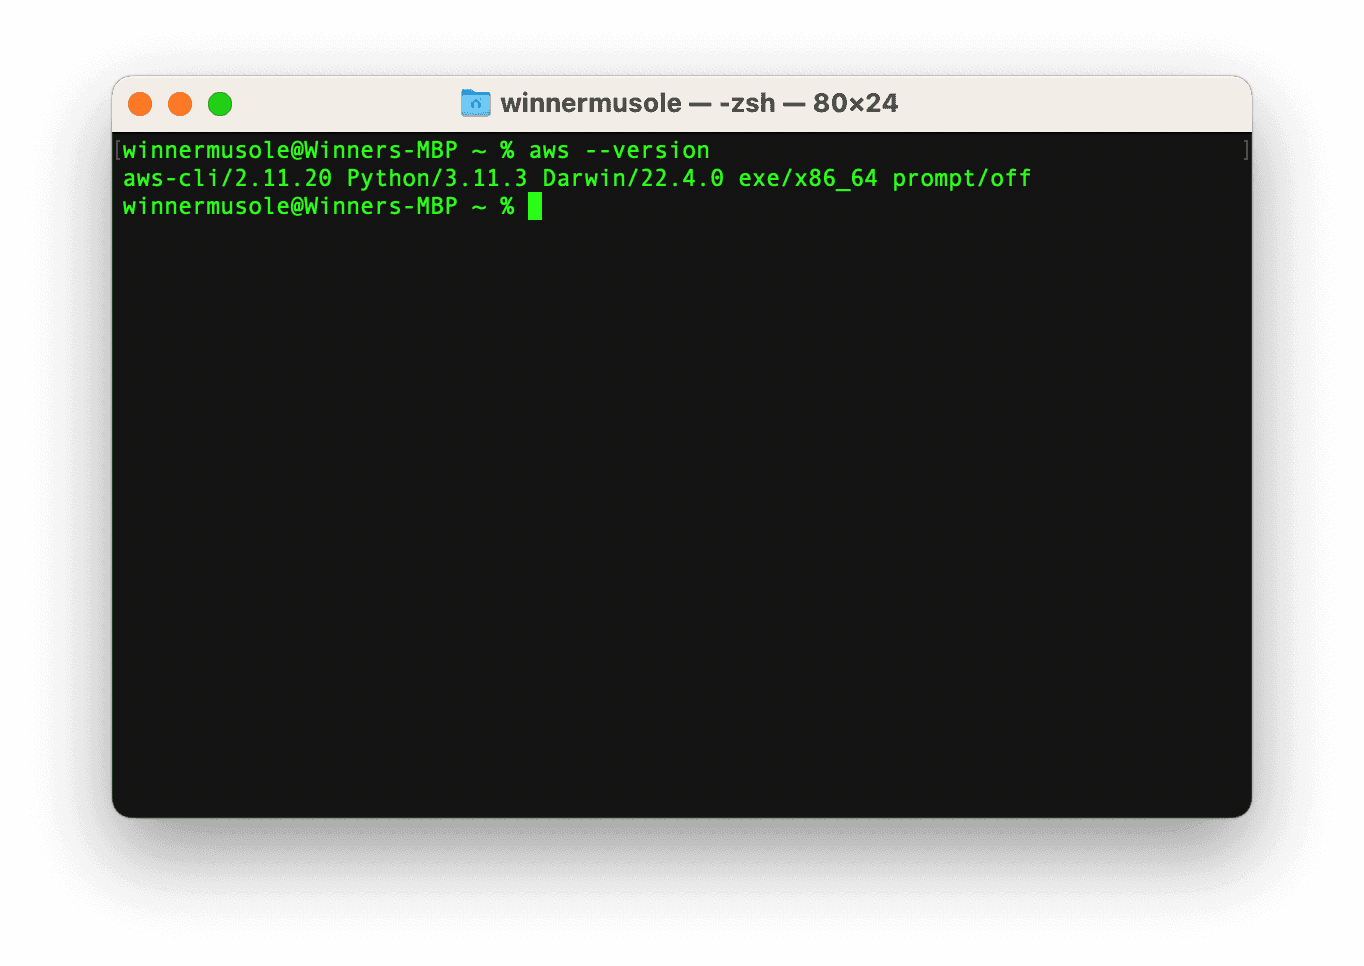
If everything went well, you must have AWS CLI already in your system. Please verify
the installation by running aws --version on yout terminal:
Remember the access keys we created in the last part 🤔? Run aws configure on
your terminal and paste the keys where asked.
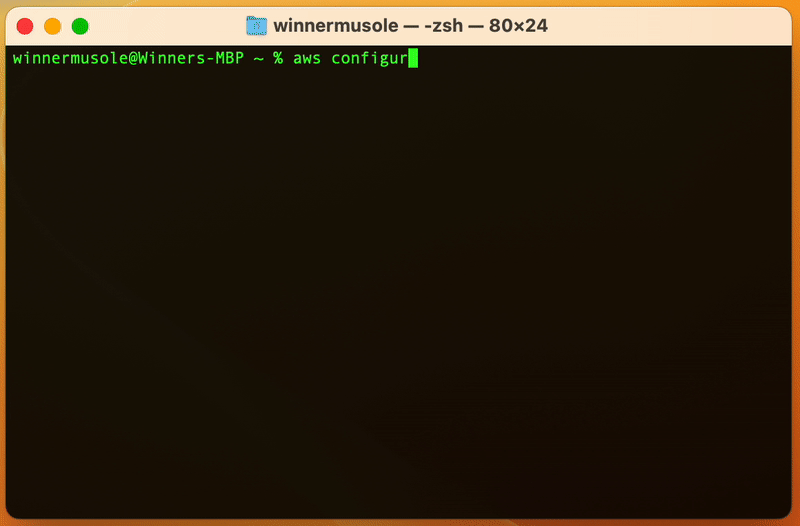
AWS CLI was just provided with our IAM user credentials, this step is important as Terraform on your behalf, will use the registered keys to access the AWS EC2 service and create resources.
Terraform Configuration
Before jumping straight to the configuration, let's say something about Terraform. As mentioned in the intro, cloud resources are provisioned in different ways including IaC (Infrastructure as Code), which consists of creating virtual resources with codes. Unlike cloud user interfaces where one manually creates virtual servers, IaC implies defining the desired specifications of a virtual server with code, enabling team collaboration and version control.
Terraform is one of the most popular IaC tools, it is easy to use and can work with multiple cloud providers. With Terraform, one defines his/her cloud resource state in a configuration HCL file that Terraform Engine reads and processes. Download the Terraform Engine binary here 👈🏽
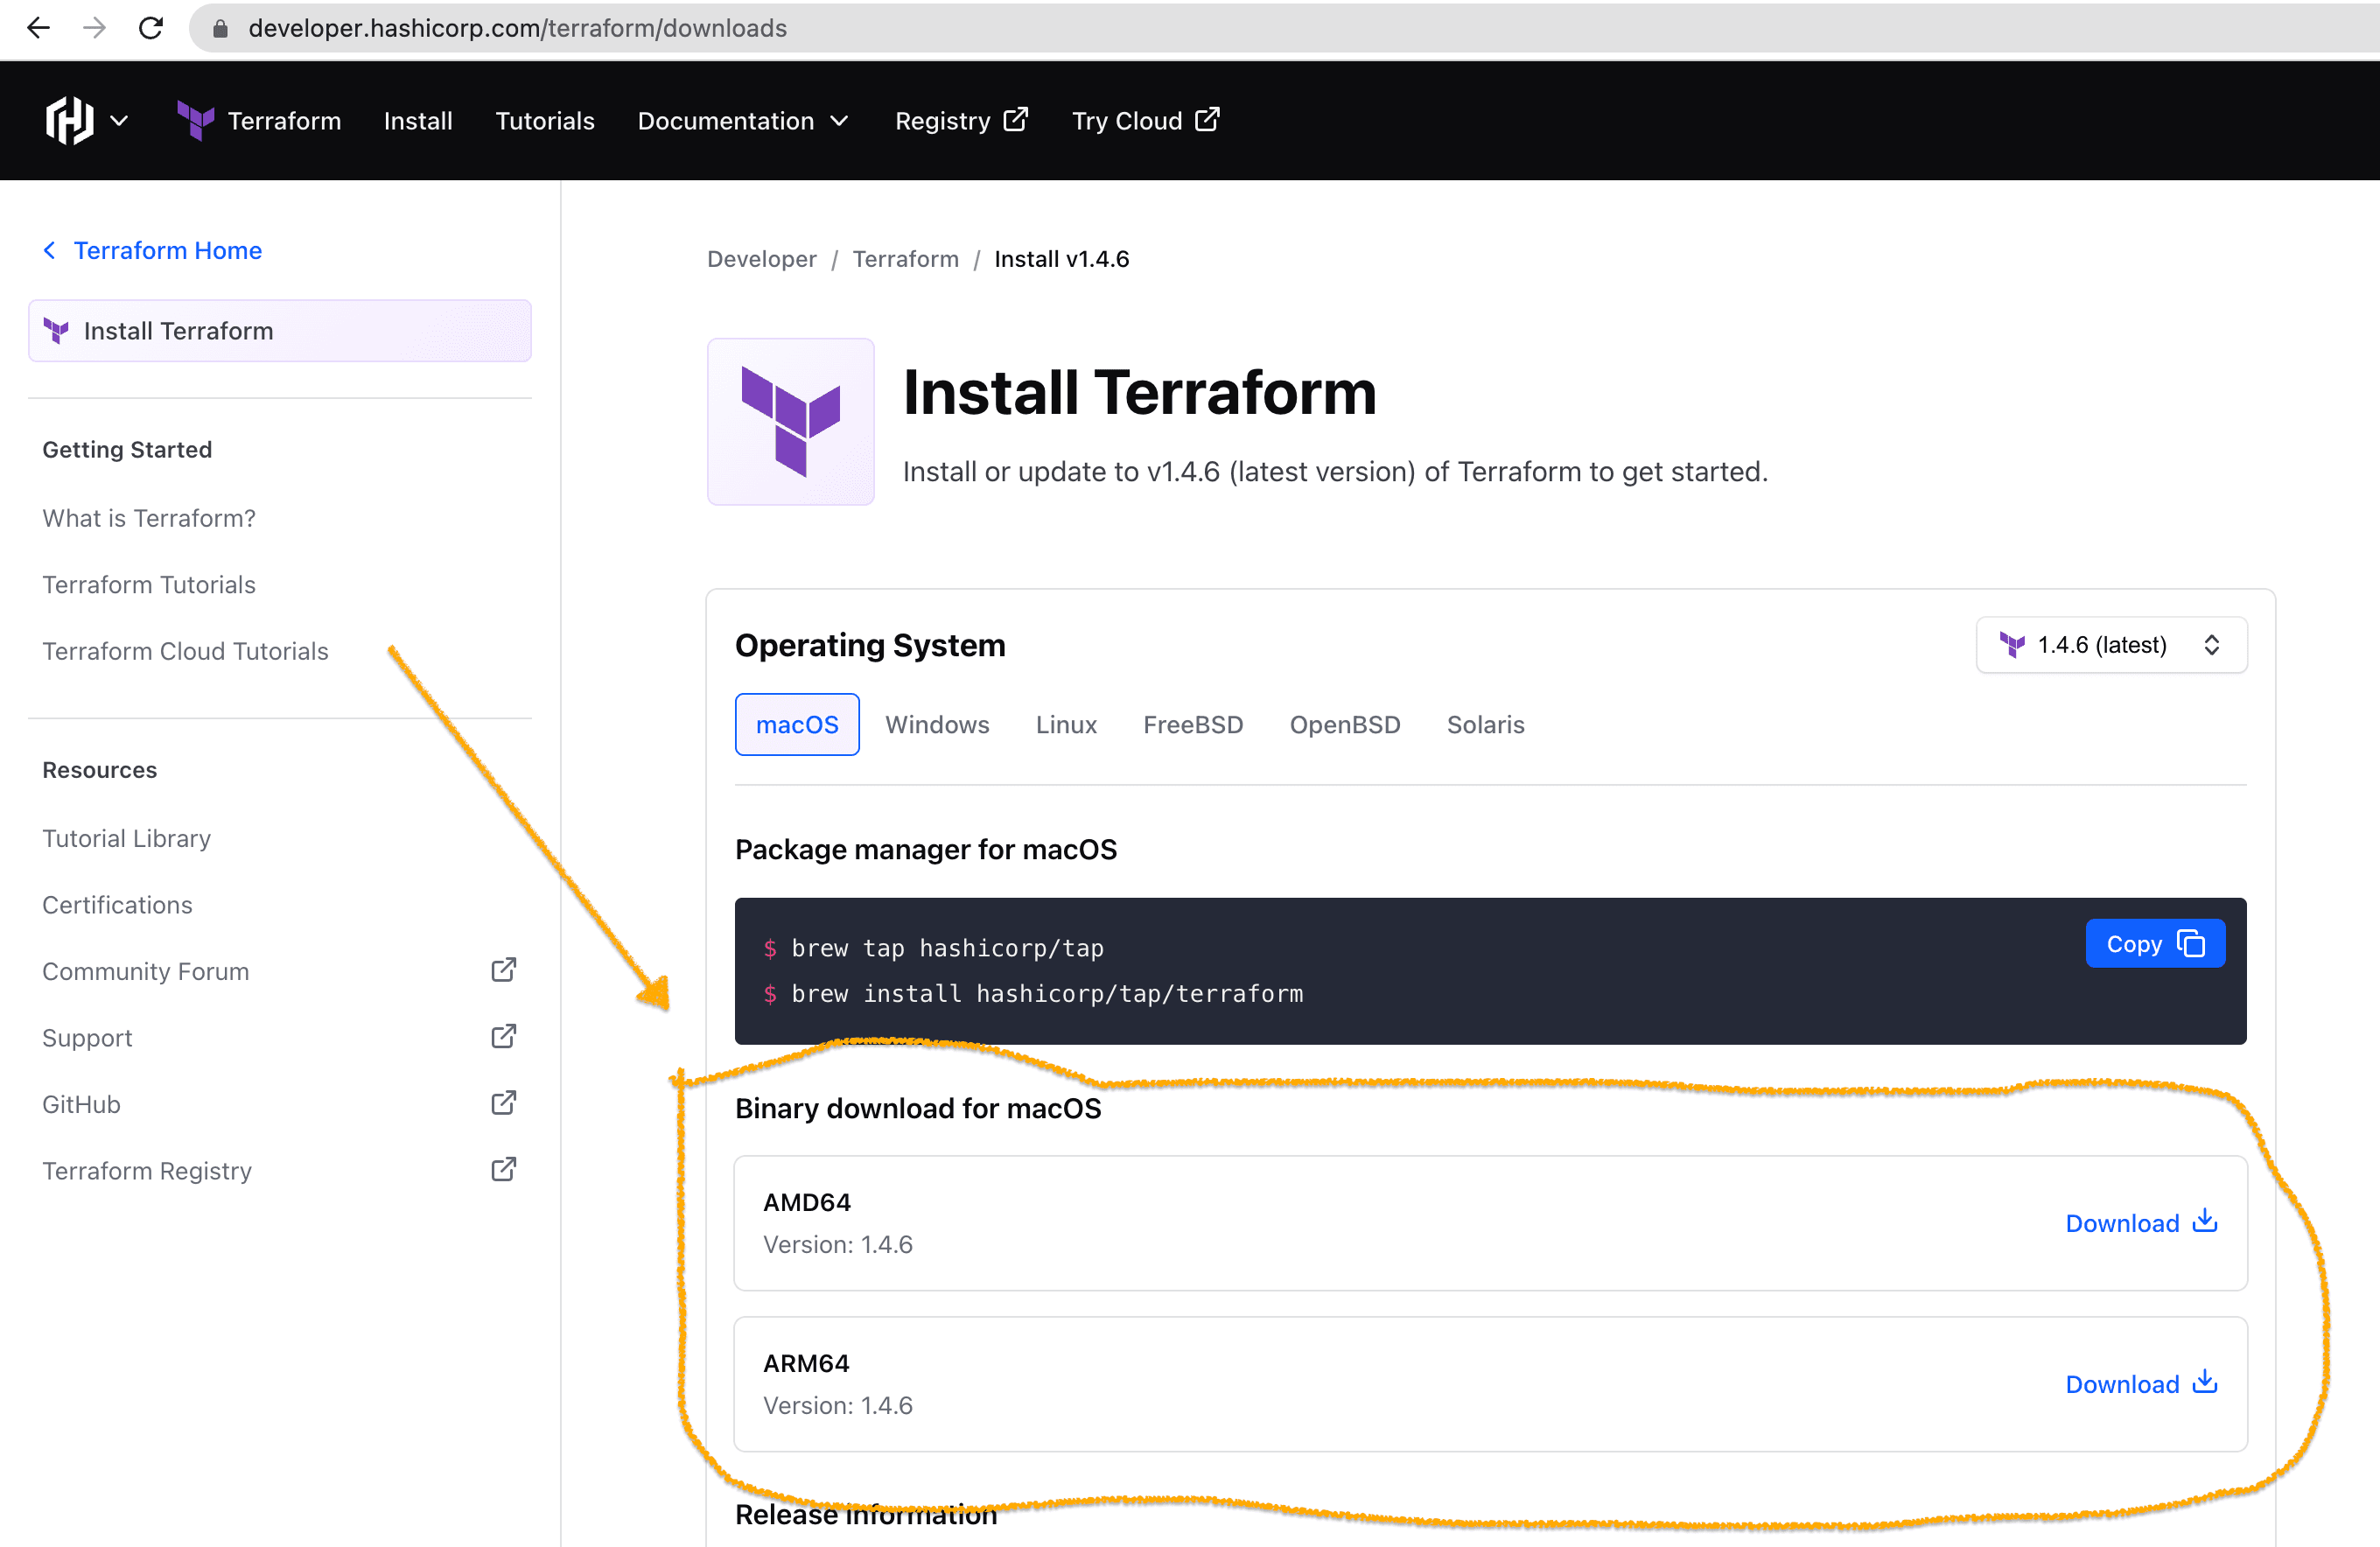
You may choose the appropriate file to download, one that suits your operating system. A zip file will be saved probably in your Downloads directory, then open your terminal in that directory, unzip the Terraform package to extract the binary , and make sure to have it available on your PATH.
The installation of Terraform Engine must be a success if all the tips have been followed closely. If not, please read again, or better go through the video found here 👈🏽 for more insights.
Now everything is ready to provision our EC2 instance on AWS using IaC, so let's do it in the next section.
EC2 Instance Declaration
An EC2 Instance is simply a virtual server in Amazon Web Service where users can run applications and services. It offers a number of computing capacities such as CPU, memory, storage, and networking.
Here we want to write a Terraform configuration file that will provision an EC2 instance based on a Linux operating system, with 1 CPU, 1 gigabyte of memory, and 30 gigabytes of storage. The instance should have the following pre-installed:
- Java Development Kit 11
- Maven Java applications
- Jenkins installed and running
Additionally, the EC2 instance should accept incoming SSH, TCP, and HTTP connections and allow all outgoing connections.
With no delay, let's create a working directory, move into it, create a .tf file named main.tf (our Terraform configuration file), a .sh file named init_config.sh and declare the state of our instance with the code.
mkdir Terraform-Dev
cd /Terraform-Dev
touch main.tf
touch init_config.sh
With your favorite code editor, open our working directory and put the configuration below in init_config.sh:
#!/bin/bash
sudo apt-get update
sudo apt-get install openjdk-11-jdk -y
sudo apt-get install maven -y
curl -fsSL https://pkg.jenkins.io/debian-stable/jenkins.io-2023.key | sudo tee \
  /usr/share/keyrings/jenkins-keyring.asc > /dev/null
echo deb [signed-by=/usr/share/keyrings/jenkins-keyring.asc] \
  https://pkg.jenkins.io/debian-stable binary/ | sudo tee \
  /etc/apt/sources.list.d/jenkins.list > /dev/null
sudo apt-get update
sudo apt-get install jenkins -y
sudo systemctl start jenkins
In init_config.sh we defined the initial configurations we want our instance to execute during the startup process. We shall refer to this file in main.tf.
Before dealing with main.tf, we are going to create a key pair locally whose private and public keys will later be used to ssh into our EC2 instance. Open your terminal in the working directory and run the following command:
ssh-keygen -t rsa -b 2048 -f terra-key-pair.pemWhile executing this command, you are going to be prompted to enter a passphrase and confirm it, please make sure to remember the passphrase you put since it will be needed in the last part.
The command generates two files:
terra-key-pair.pemthe private keyterra-key-pair.pem.pubcontaining the public key.
Now open main.tf and parse the code below:
terraform {
  required_providers {
      aws = {
          source = "hashicorp/aws"
          version = "~> 4.0"
      }
  }
}

provider "aws" {
  region = "us-east-2" # configure aws provider
}

resource "aws_instance" "terra_demo" {
    ami = "ami-024e6efaf93d85776" # Ubuntu Server 22.04 LTS us-east-2
    instance_type = "t2.micro" # instance type, within the Free Tier
    vpc_security_group_ids = [ aws_security_group.terra-demo.id ]
    key_name = aws_key_pair.terra-demo.key_name
    root_block_device {
        volume_size = 30 # Size of the root volume in GB
        volume_type = "gp2" # General Purpose SSD (default)
        delete_on_termination = true
    }
    user_data = "${file("init_config.sh")}"  # REFERENCE TO INITIAL CONFIGURATION FILE
}

resource "aws_key_pair" "terra-demo" {
    key_name = "terra-demo-key"
    public_key = "PUT YOUR OWN PUBLIC KEY"
}

resource "aws_security_group" "terra-demo" {
    name = "terra-demo-security-group"
    ingress {  # ALLOW INCOMING HTTP TRAFFIC
        from_port = 80
        to_port = 80
        protocol = "tcp"
        cidr_blocks = [ "0.0.0.0/0" ]
    }
    ingress { # ALLOW INCOMING TRAFFIC AT PORT 8080
        from_port = 8080
        to_port = 8080
        protocol = "tcp"
        cidr_blocks = [ "0.0.0.0/0" ]
    }
    ingress { # ALLOW SSH INCOMING CONNECTION
        from_port = 22
        to_port = 22
        protocol = "tcp"
        cidr_blocks = [ "0.0.0.0/0" ]
    }
    egress { # ALLOW ALL OUTGOING TRAFFIC
        from_port = 0
        to_port = 0
        protocol = "-1"
        cidr_blocks = ["0.0.0.0/0"]
    }
}-
In this main.tf, Terraform is configured to use AWS as a provider, which is declared in the first block of code, from line 1 to 8. You may find more about Terraform providers here 👈🏽
-
The second block in main.tf just specifies a default region you want your resources to be provisioned at. Choose the closest region for better performance, the Ohio region is near to me, so I chose us-east-2. More about Amazon EC2 regions can be found right here ⚡️. This is from line 10-12
-
From line 14-25, we configured this file to provision an EC2 instance with these specific characteristics:
- A server booting up with a Linux Ubuntu OS ->
ami = "ami-024e6efaf93d85776"is the amazon machine image ID for Ubuntu from US EAST 2 region. 📌 Please choose the Ubuntu image ID of your nearest region. instance_type = "t2.micro"is set to determine the type of instance to be provisioned, t2.micro is a general purpose instance type eligible for the AWS free tier.vpc_security_group_ids = [ ... ]refers the security group declared in the bottom of the file, which is a virtual firewall that will control network traffics to or from our EC2 instance.key_name = aws_key_pair.terra-demo...a reference to the key_pair resource declared below- This last section of the EC2 instance declaration,
user_data = "${file("init_config.sh")}"tells Terraform to configure our EC2 instance with the scripts found ininit_config.shwhich will download and install the Java Development Kit, Maven and Jenkins on our virtual server.
- A server booting up with a Linux Ubuntu OS ->
-
From line 27-30, we declared a key_pair resource that Terraform will create and attach to our EC2 instance. 📌 Make sure to parse your own public key found in the
terra-key-pair.pem.pubfile.
-
The last block, from 32-58 will create a security group for the instance and attach security group rules that allow incoming TCP connections for SSH (at port number 22), HTTP (port number 80) and at 8080 and all outgoing connections.
EC2 Instance Launch
To execute our configuration file main.tf and launch our EC2 instance with its key pair and security group, let's once again open a terminal in our working directory /Terraform-Dev
and run the following commands:
terraform init: the first command to run after writing a new Terraform configuration, or making changes in an existing one. It automatically downloads and saves important plugins such as the AWS Terraform provider.terraform plan: a Terraform command that generates an execution plan by querying the AWS API to fetch the information available in your AWS EC2 instance in order to compare it to the information declared in main.tf. It kind of prepares what resources are to be provisioned.terraform apply: a command that creates the EC2 instance on AWS based on the execution plan generated by terraform plan.
Here is how you do it 👇🏾
Hourra 😀, Terraform has successfully created our desired resources, an EC2 instance, a key pair, and a security group. To visualize that run the AWS CLI command below:
aws ec2 describe-instances \
  --filters Name=instance-state-name,Values="running" \
  --region us-east-2 \
--query "Reservations[*].Instances[*].{Instance: InstanceId, AMI: ImageId, Type: InstanceType, Availability_Zone: Placement.AvailabilityZone, Ip_Address: PublicIpAddress, DNS_Name: PublicDnsName, Key_Pair: KeyName, Security_Group: NetworkInterfaces[0].Groups[0].GroupName}"Note: 📌 Make sure to put the region you provided in the main.tf file.
This command returns the EC2 instance ID, Amazon Machine Image, type, availability zone, public IPv4 address, public DNS name, key pair name, and security group name.
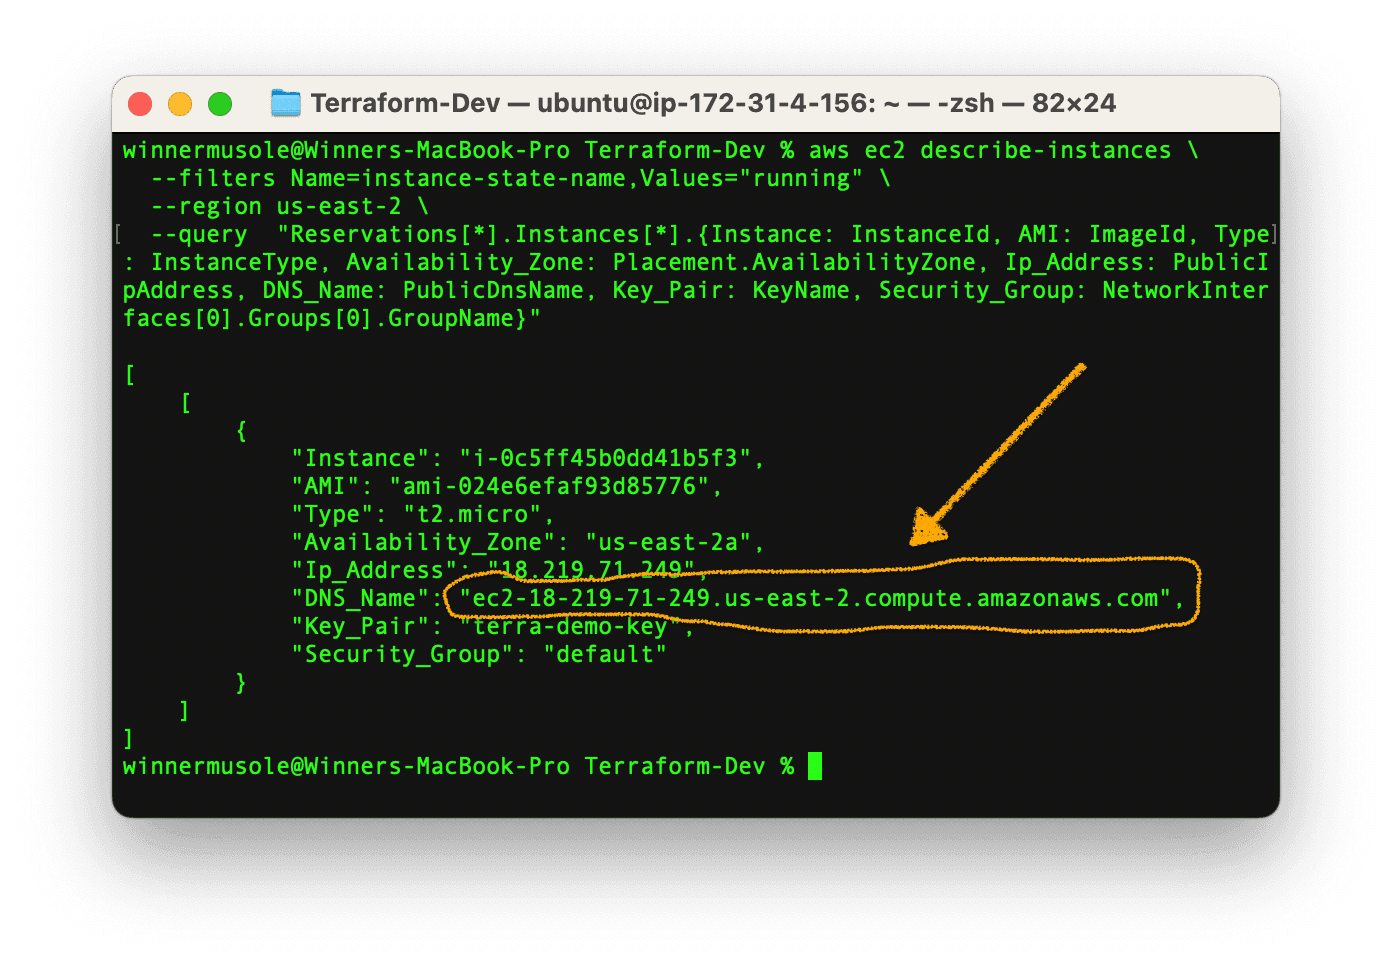
Note: 📌 Save your EC2 instance public DNS name because you will need it for the next command. Also, keep in mind that the EC2 service generates a new IP address for every EC2 instance rebooted or started after a stop, so you may have a different DNS name if you had destroyed and re-deployed your instance. In such a scenario, just run the previous command to get a new DNS name.
We have just provisioned a virtual Ubuntu machine with a number of pre-installed software such as JDK, Jenkins and Maven to ensure the automated build and deployment of a Java application.
Well now let's connect to the jenkins process in our server on port 8080. Go ahead, navigate to the following link on your browser:
http://<Your EC2 instance public dns name>:8080Note: 📌 Also there 👆🏾, remember to put your EC2 instance dns name just like I put mine in the sample below:
http://ec2-3-164-7-102.us-east-2.compute.amazonaws.com:8080/You have been directed to the Jenkins login page where you are asked to enter an administrator password which is found in the file encircled below:
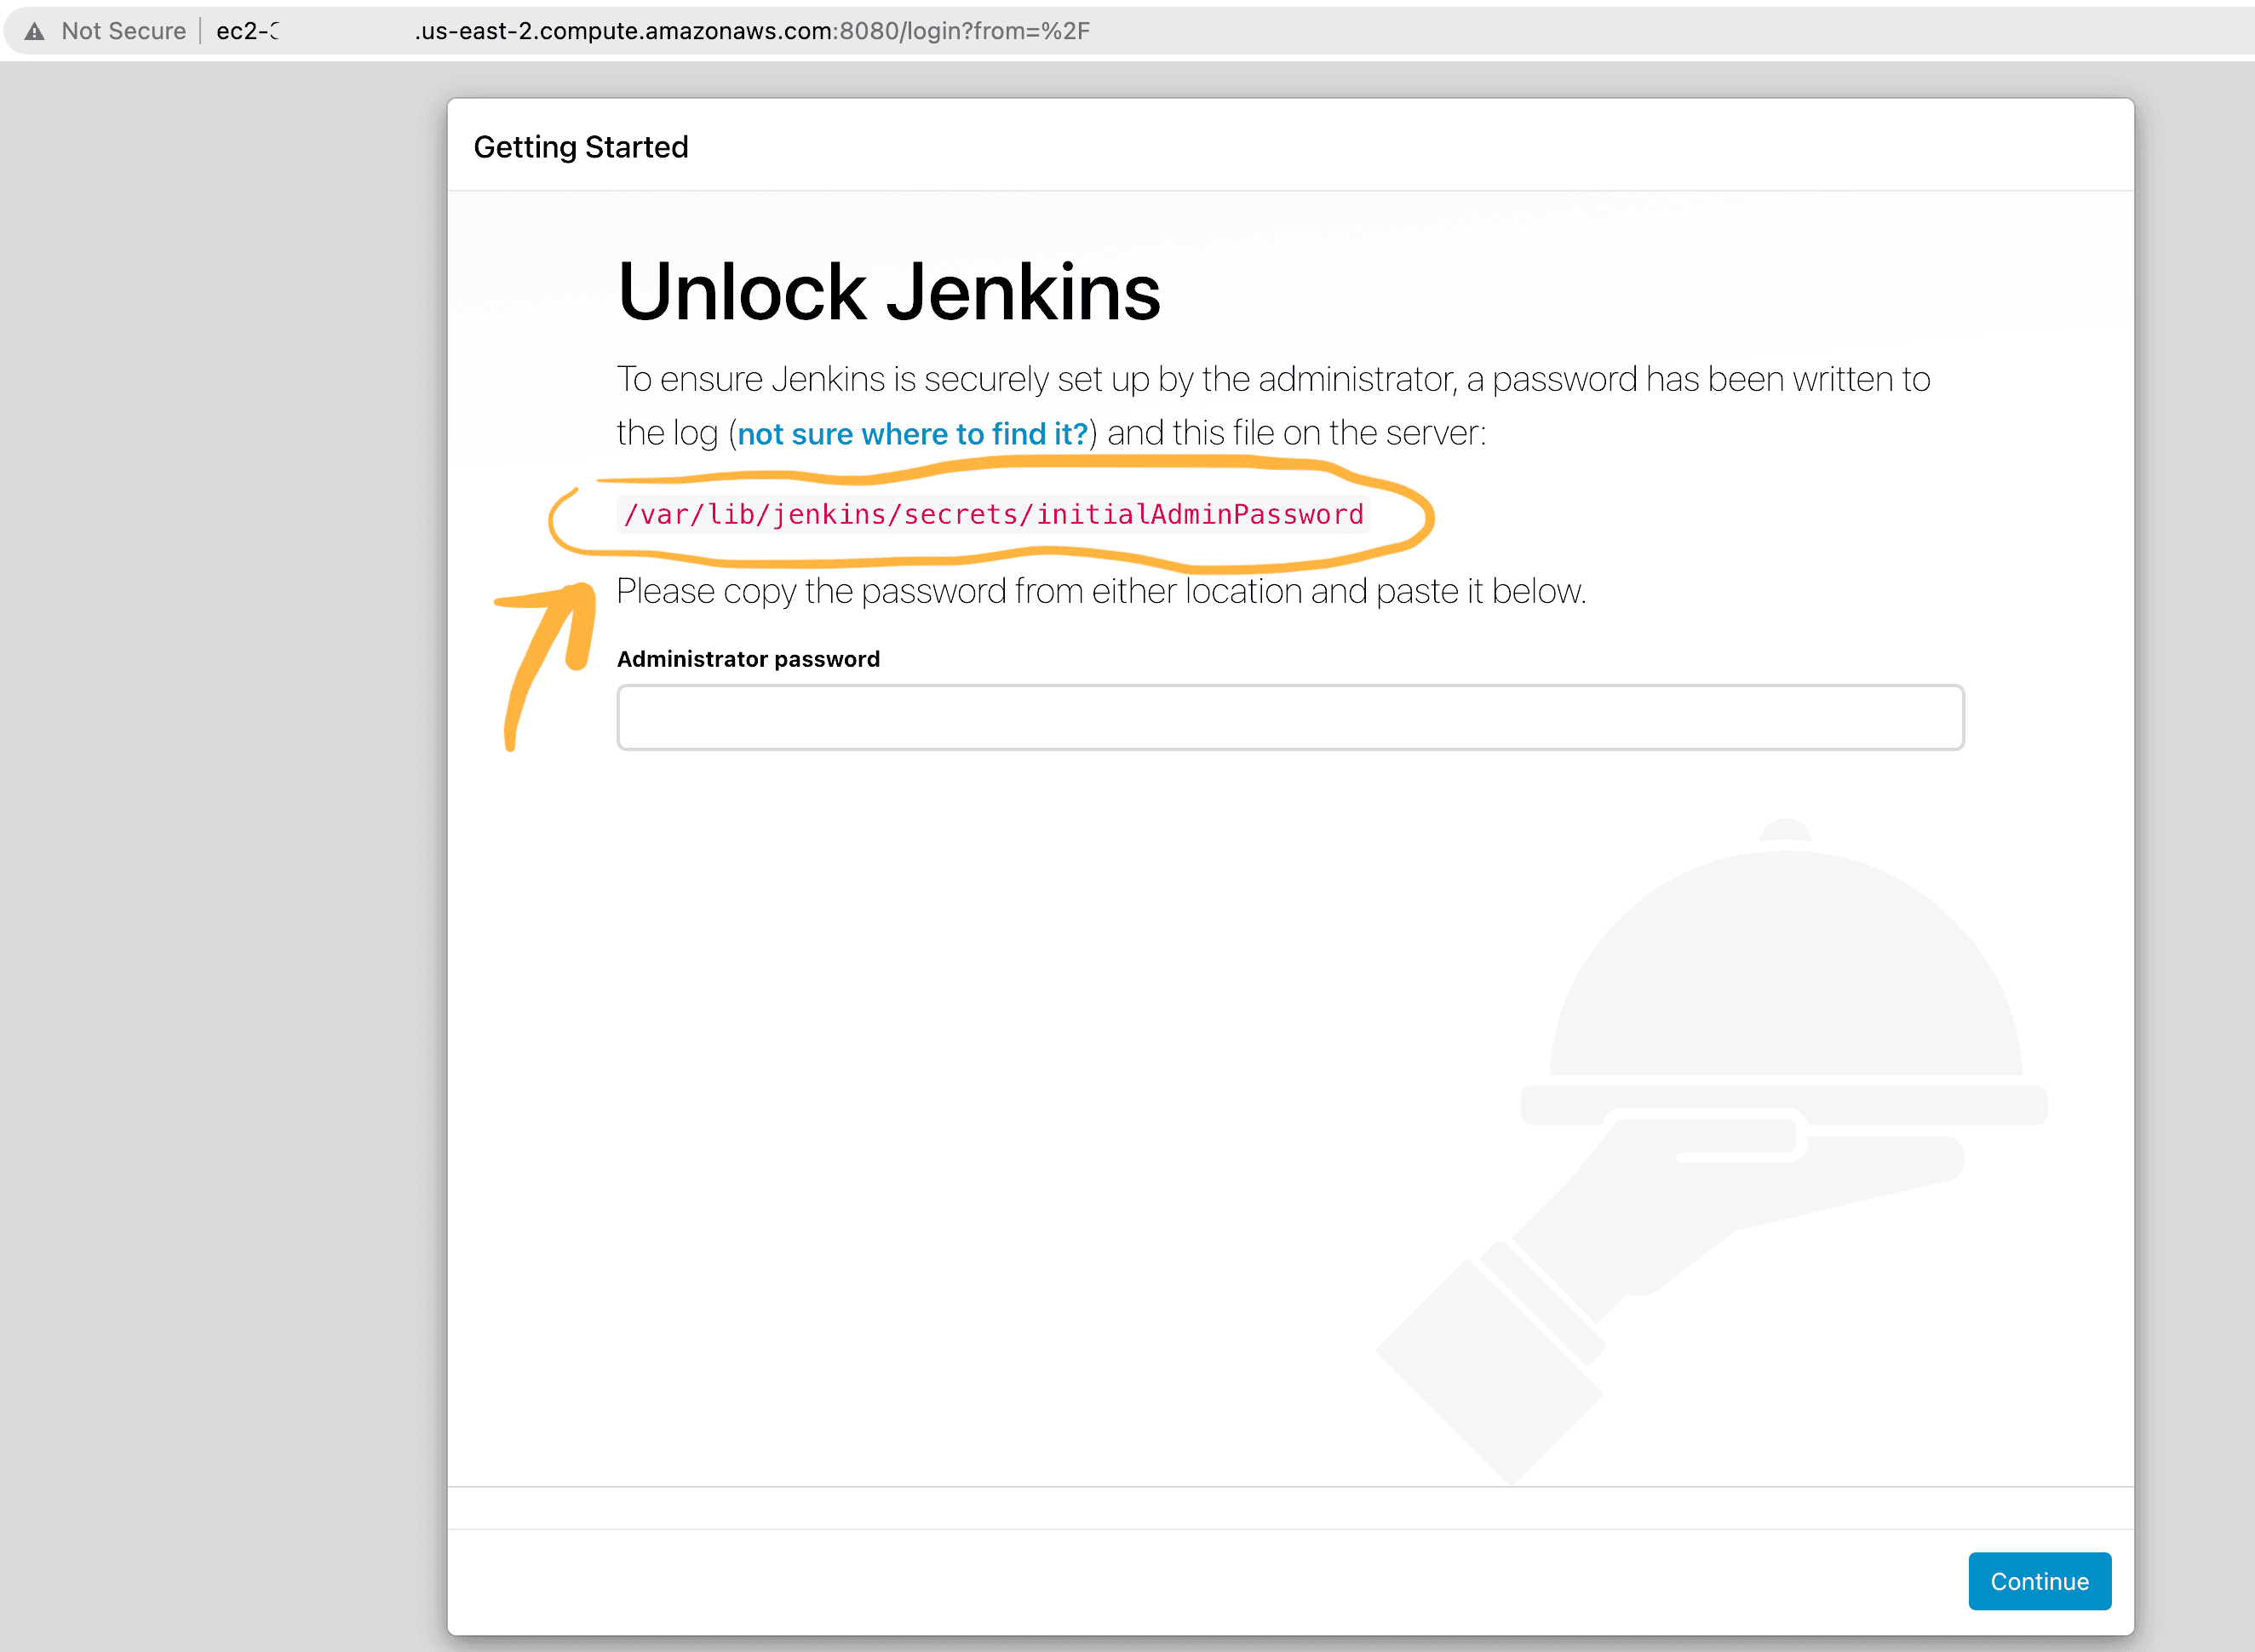
To read that password file, we are going to remotely gain access into our EC2 instance , and that is the next and last task of this hands-on.
EC2 Instance Remote Access
Do you remember the key pair we created earlier 🤔? Well, we used the public key in the terra-key-pair.pem.pub file to create a key pair resource for our EC2 instance, now, let's use the terra-key-pair.pem file to securely access our server. Run the command below but make sure to put your own EC2 instance Public DNS name where indicated:
ssh -i "terra-demo-key.pem" ubuntu@<YOUR-EC2-INSTANCE-PUBLIC-DNS-NAME>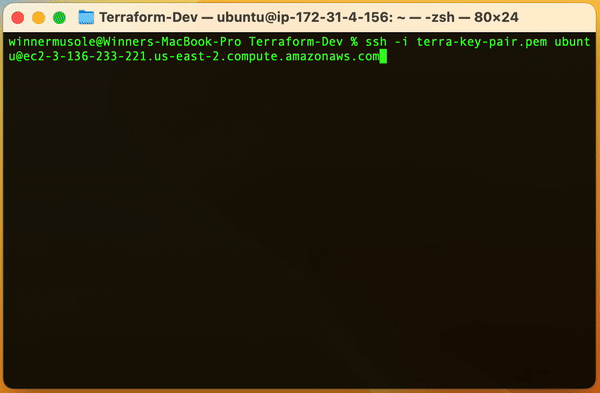
Note: 📌 At the first run, you may be prompted to provide the same exact passphrase you gave earlier to generate the key pair. 🤞🏾 Hope you kept it somewhere.
Once within our server, let's get the jenkins admin password by:
sudo cat /var/lib/jenkins/secrets/initialAdminPassword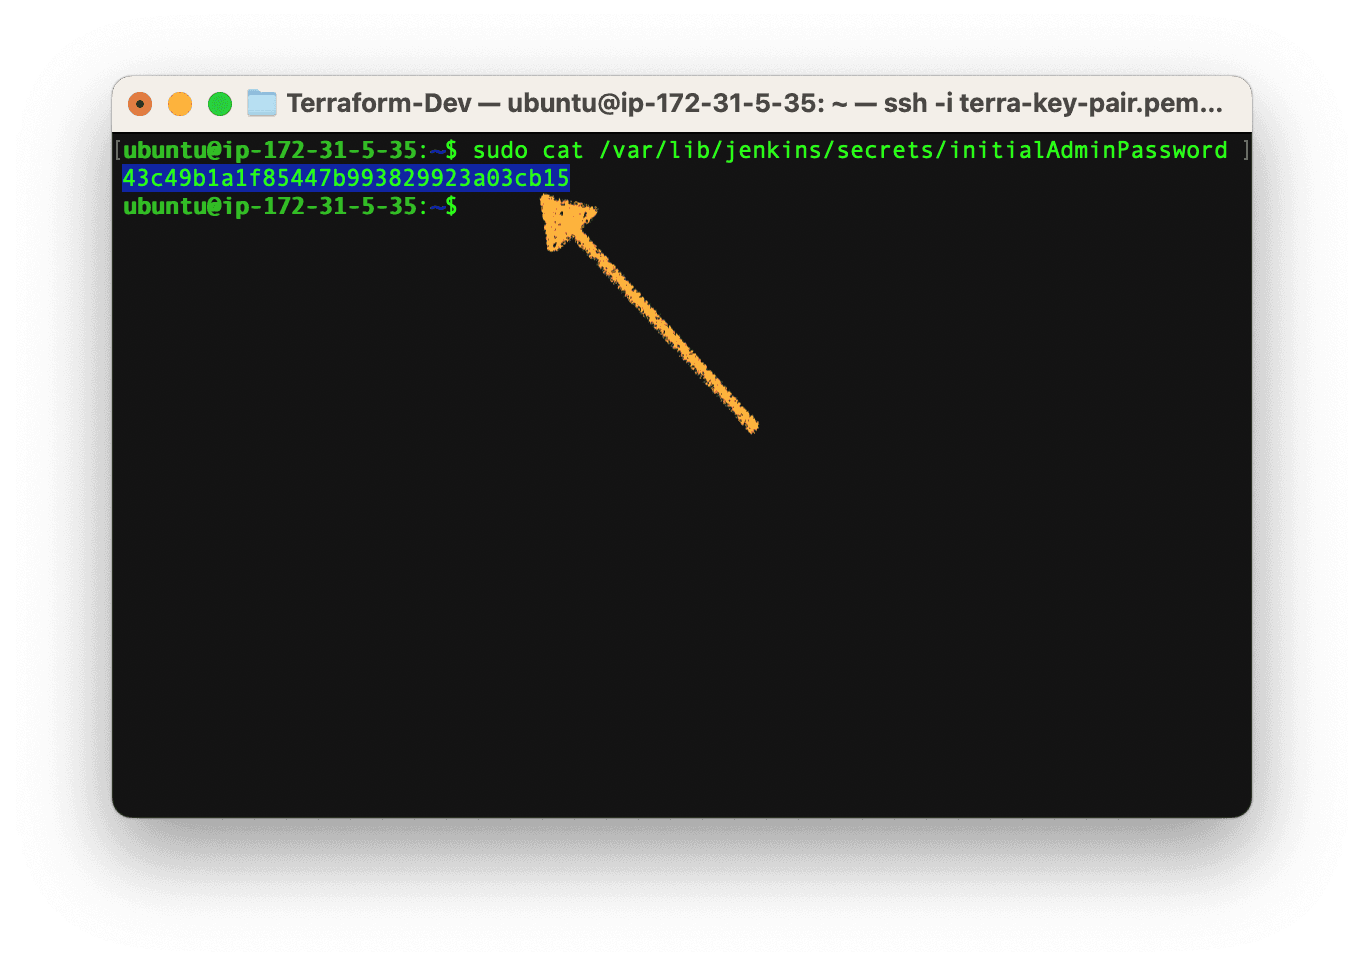
Copy the password above, move back to your browser, paste it in the password field on the Jenkins login page and click continue.
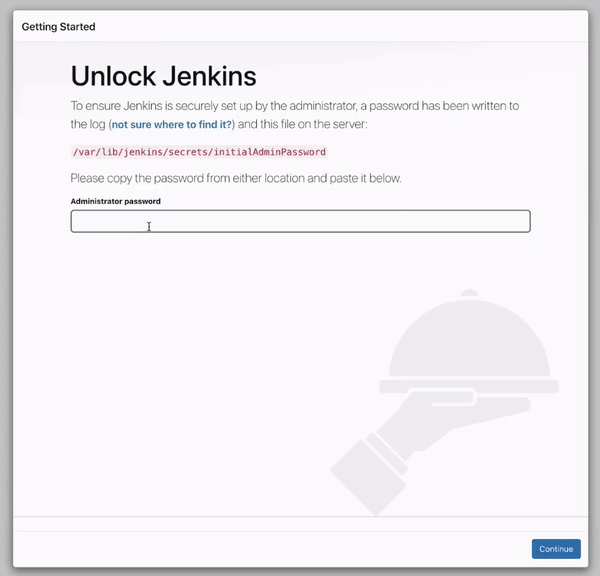
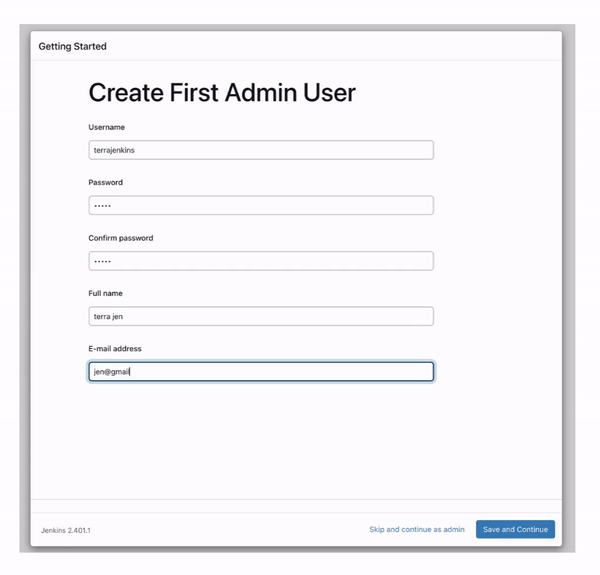
As shown above, we have installed the suggested Jenkins plugins and reached the page where we will create our first Jenkins admin user. Go ahead, fill up the form and follow the procedures.
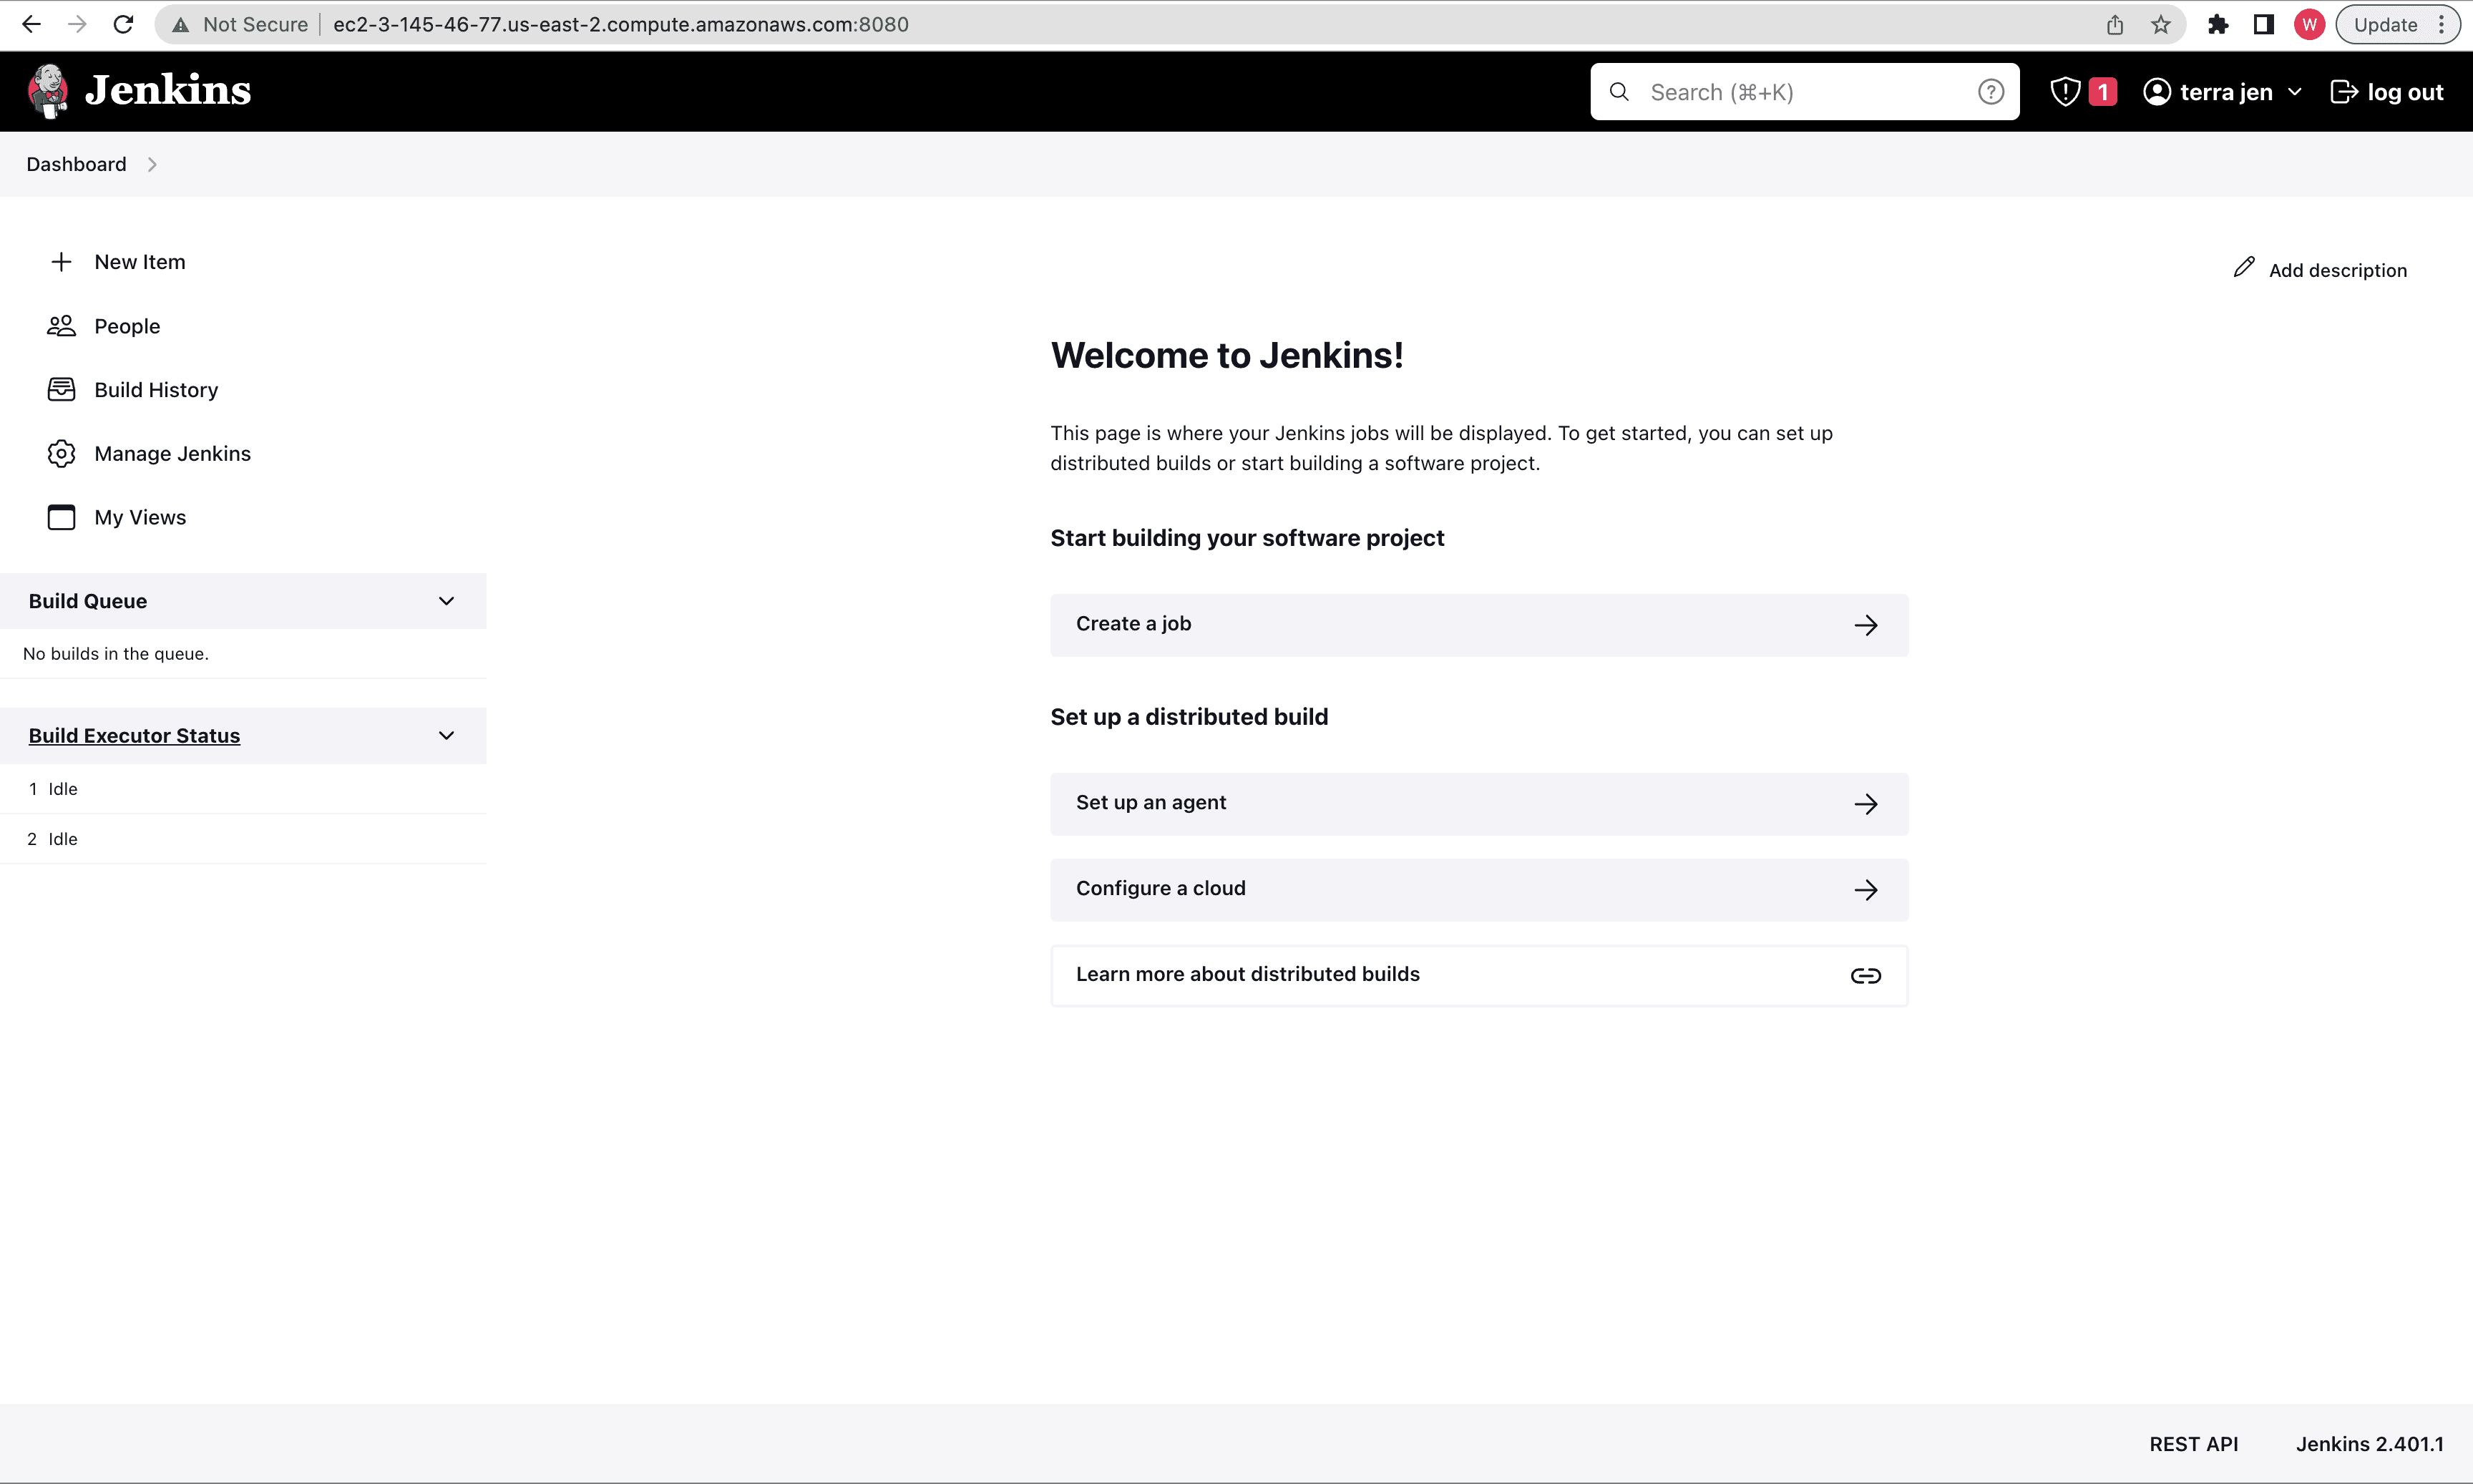
You will finally land on the Jenkins dashboard where all processes involving the automated build and delivery of Java application is done and that we shall explore very soon.
Wrapping up
Great job! we are done with our practice over which we gained hands-on experience with launching virtual servers on the cloud by combining AWS IAM and EC2 service and Terraform. This practice was a great guide in implementing user access restrictions and securing the provision of EC2 instances with the Infrastructure as Code approach.
Additionally, Infrastructure as Code was employed to automate the configurations of the resources deployed. For example, our EC2 instance has been created with Java, Maven, and Jenkins already up and running. Also, virtual security firewalls were configured by declaring resources like a security group with specific network rules.
We configured the EC2 instance to accept all outgoing connections but to limit incoming connections to TCP at port 22 for secure shell communications, 80 for HTTP, and 8080 the default port Jenkins runs on.
Next on this website, we shall dive into Jenkins by implementing a continuous integration and continuous delivery pipeline to automate the build, test, and deployment of Java applications.
Complete code can be found here https://github.com/musole-masu/Terraform-Demo
💣 Terraform Destroy

Finally, to prevent unwanted billing, it's important not to let your resources running on
AWS especially when you are no longer using them. The terraform destroy
command destroys all resources created by terraform apply, so open your terminal
in the same working directory to run:
terraform destroy